One of my dear friends in Germany is the ultimate stay-at-home mom role model. She is always coming up with amazing Montessori activities, making play-doh and baking healthy snacks for her kiddo. After hearing about her amazing momming moments, I am forced to try them at home for Carson. Forced is a strong word. It’s more like, she had and executed a great idea and I should probably do the same because it’s a perfect enrichment activity for Carson as she isn’t in a kindergarten (preschool) yet.
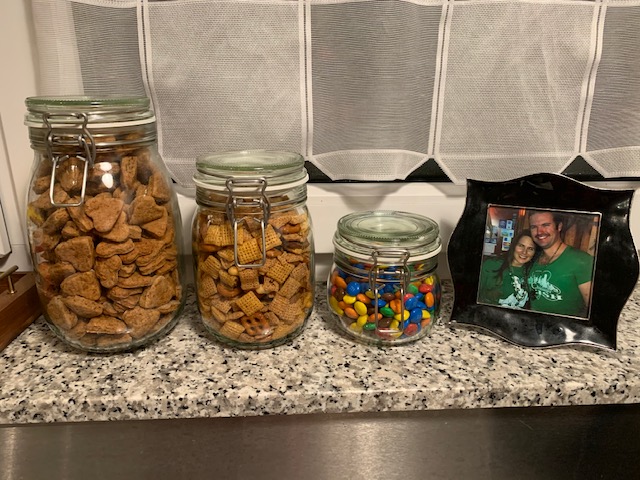
One day, her little one was carrying around homemade animal crackers…let me say this once more for the people in the back, HOMEMADE ANIMAL CRACKERS! I thought to myself, I can do that. And I did! I used Pinterest and found an animal cracker recipe from A Modern Homestead. They turned out wonderfully. I have since made this recipe 3 more times because not only does Carson eat the crackers but so do her parents 😊. Below is the recipe.
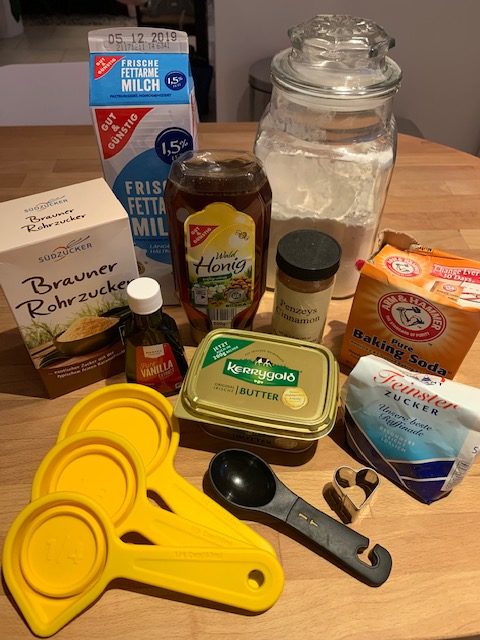
Ingredients
- 2 1/2 cups flour
- 2 teaspoons baking soda
- 2 teaspoons cinnamon
- 1/3 cup butter at room temperature
- 1/3 cup brown sugar
- 1/8 cup sugar
- 1 tablespoon vanilla extract
- 2 tablespoons honey
- 1/2 cup milk
Instructions
- Preheat oven to 350 F (or 170 C). Line baking sheets with parchment paper. My German oven only holds 1-9×13″ baking sheet so I prepare 3 parchment sheets.
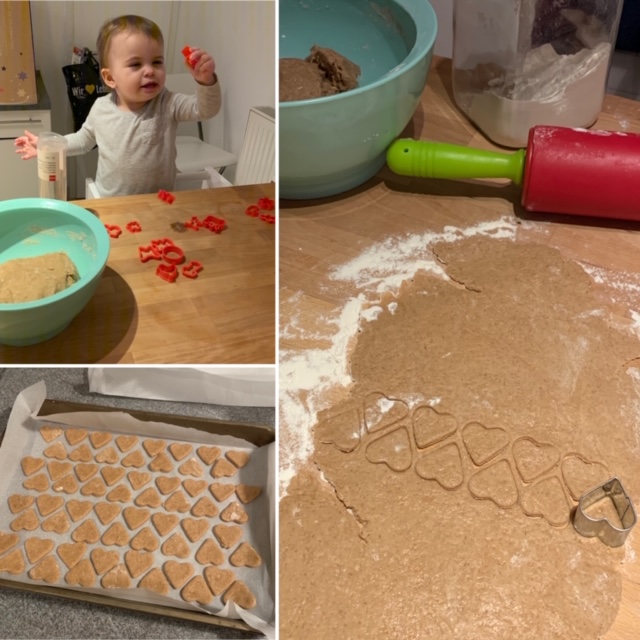
- In a mixing bowl, combine the flour, baking soda, and cinnamon. The original recipe calls for an electric mixer but I do it all by hand as my American electronics don’t work in Germany and I don’t see the need to purchase something I’m only going to use sporadically for another year.
- Next add in butter, brown sugar, sugar, vanilla, honey and milk. If you are using an electric mixer as suggested, hold off on the milk until your dough looks like small peas. Then add the milk and process until your mixture forms a ball. Again, I stir it all by hand so it’s easiest for me to add the milk with the other ingredients.
- Divide the dough into two balls. Dump one of the balls onto a well floured surface.
- Roll the dough as thin as you can 1/8-inch to 1/4-inch thick.
- Use your mini animal cookie cutters to cut shapes. Place shapes on lined baking sheets until a tray is filled. For the first batch, I used a variety of mini cookie cutters. For the last few batches, I have stuck with a heart. I can quickly stamp the heart shape and can get quite a few of them on each tray (extremely helpful as I only have the 1-9×13″ baking sheet that fits into my oven at a time).
- Bake for 9 to 13 minutes or until golden brown. Allow to completely cool and store in an airtight container. I have found that if left in for 9 minutes, the cookies have a soft texture. If left in for 13 minutes, they are quite crunchy. My family likes the crunchy version so 13 minutes is our wait time.
- Repeat with the remaining dough until all the dough has been used. This can take quite awhile if you are not utilizing the surface of your dough to its maximum advantage (see: heart shape).
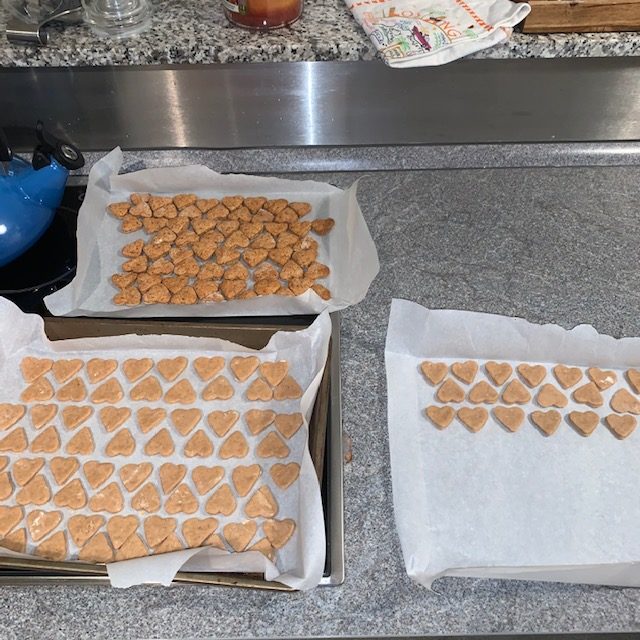
Tip
As mentioned earlier, I lay out 3 pieces of parchment paper to line the 1-9×13″ baking sheet that fits in my oven. When my production is in full swing 1 sheet has cookies cooling, 1 sheet is in the oven with cookies baking, and 1 sheet is getting lined with raw cookie dough. Its a system that works for me and keeps things moving along in my small European kitchen.